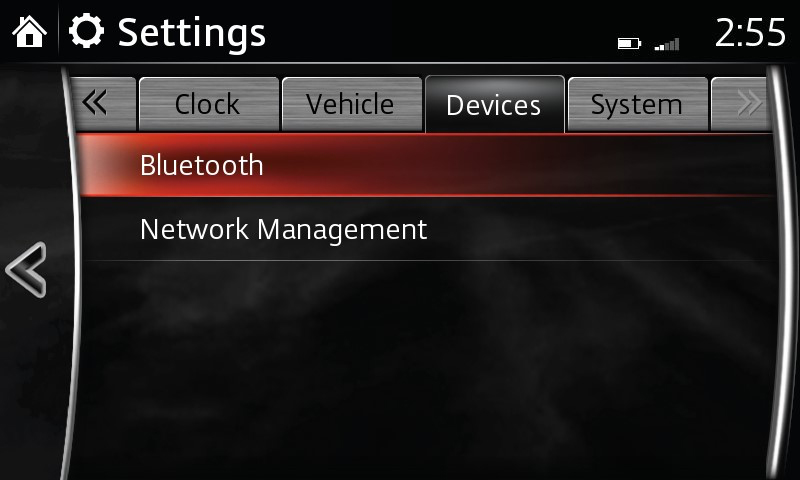
In order to activate your 60-day free trial for Connected Services, you have to connect your infotainment system to a Wi-Fi™ hotspot. To turn on the Wi-Fi™ in your infotainment system, and then to connect to a hotspot, please follow the steps described below.

Upon turning on the Wi-Fi™, a list with the available networks is displayed. The list contains the network’s name, its security type and its signal strength.
If there is no available network, you can create a Wi-Fi™ hot spot with your phone (please refer to phone’s owner’s manual for instructions), and then select it from the available networks list within the devices menu. The system can be connected to any available Wi-Fi™ hotspot.
When the connection to a Wi-Fi™ network is successful, the  icon is displayed at the top right corner of the screen. This icon is also indicating signal strength.
The  icon is displayed next to the network name currently connected.
Once a Wi-Fi™ connection has been made, the car will automatically connect to that network whenever it is available.
If the connection to a network is lost, connection to another available network is automatic. 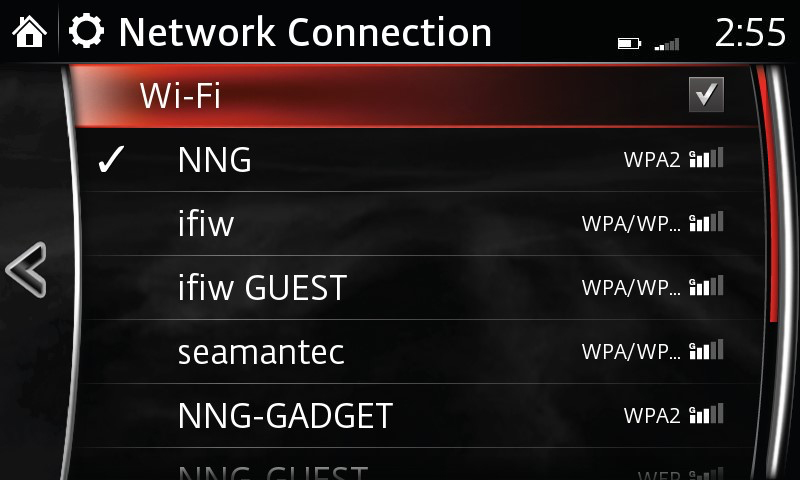
If there is no available network in the list when connecting to Wi-Fi™ for the first time, you can add a network manually.
To do so, please follow the steps below.
Once a Wi-Fi™ connection has been made, the car will automatically connect to that network whenever it is available.
If the connection to a network is lost, connection to another available network is automatic.
Upon connecting to a Wi-Fi™ network for the first time, and upon accessing the navigation menu, the system will ask you to confirm that you are authorize the usage of Wi-Fi™ for data.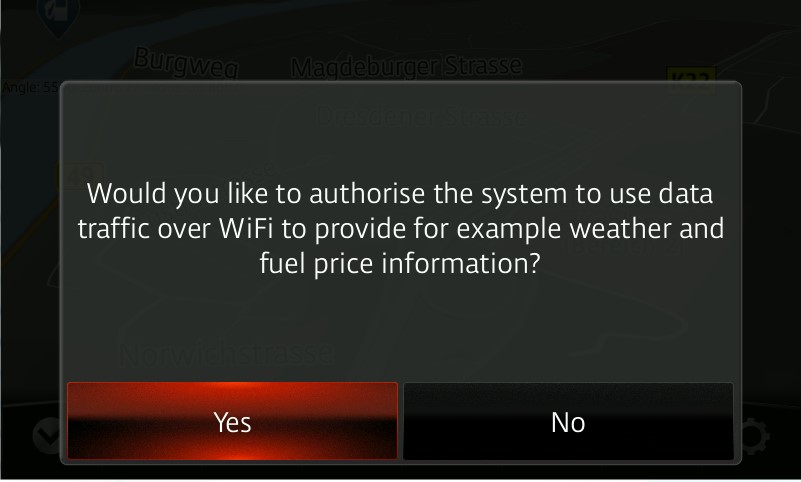
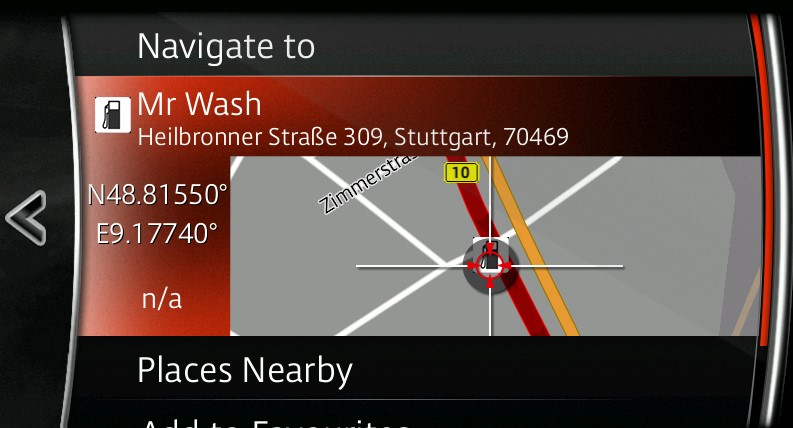
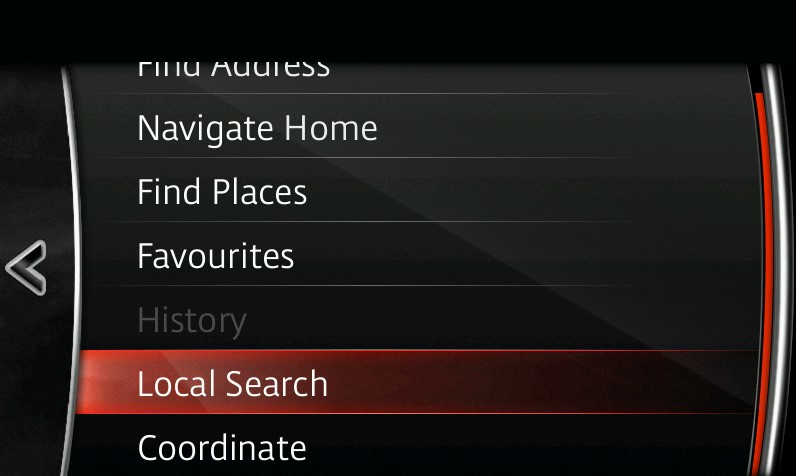
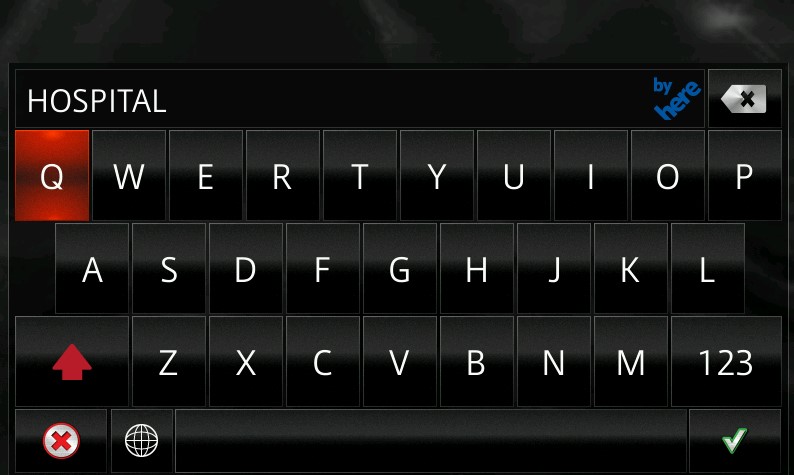
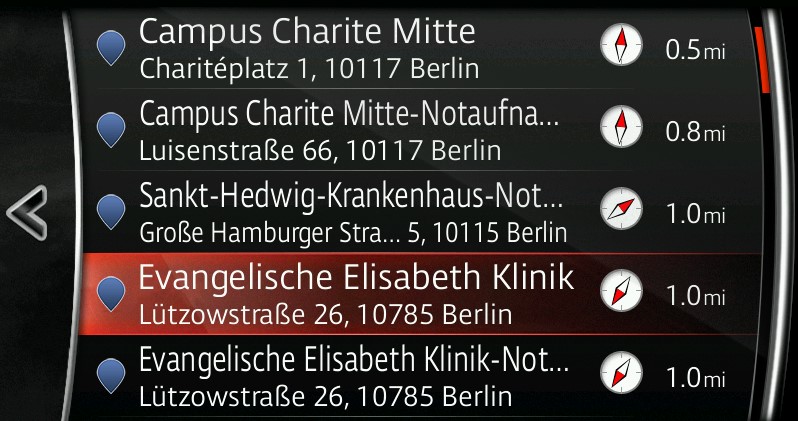
Local Search – The Local Search Connected Service allows you to search for points of interest from a large, online database. Here is how you can use this feature.
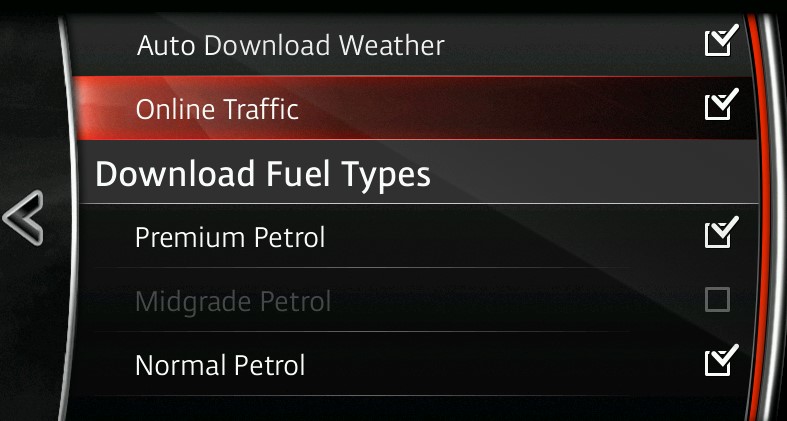
Online Traffic – The Online Traffic Connected Service gives you real-time information about traffic flow that might affect your route. Here is how to use this feature.
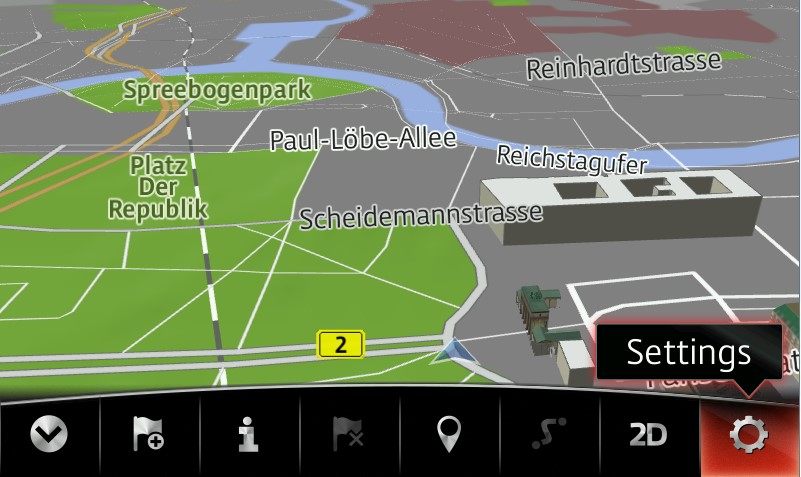

 button in the bottom menu and selecting Traffic, then selecting Traffic Settings.
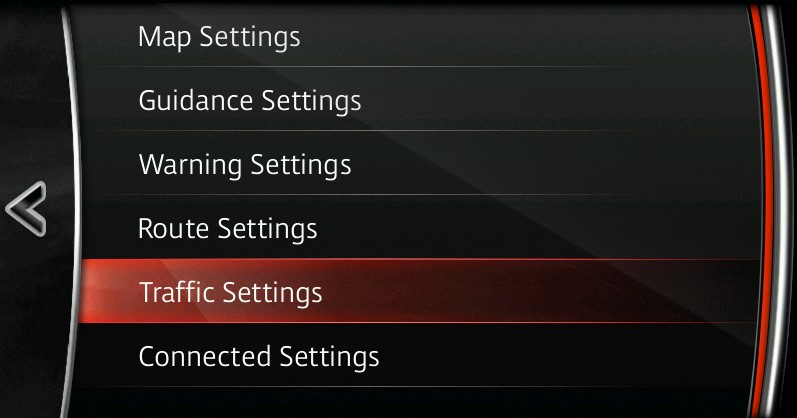

Having done these steps, live traffic will be visible when planning a route or while navigating to a destination.
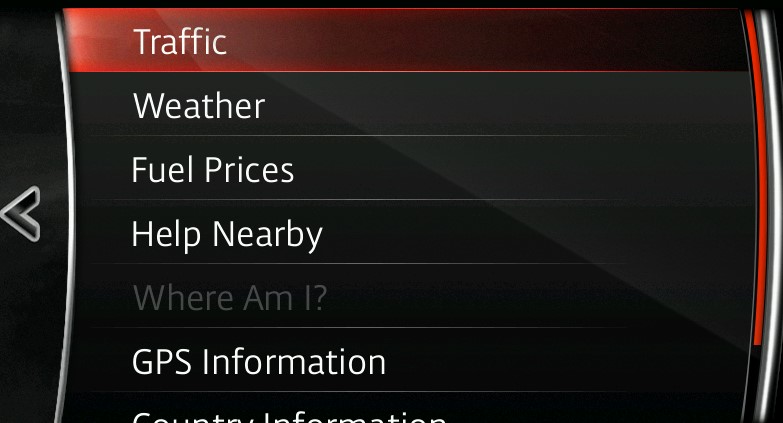
You can view current traffic conditions by pressing the button in the bottom menu and selecting Traffic.
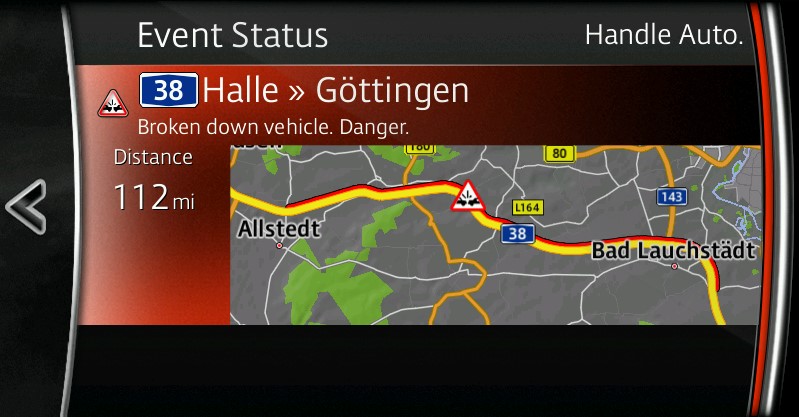
The traffic screen summarizes the events that might affect your route and gives you an estimate of the delay these may cause.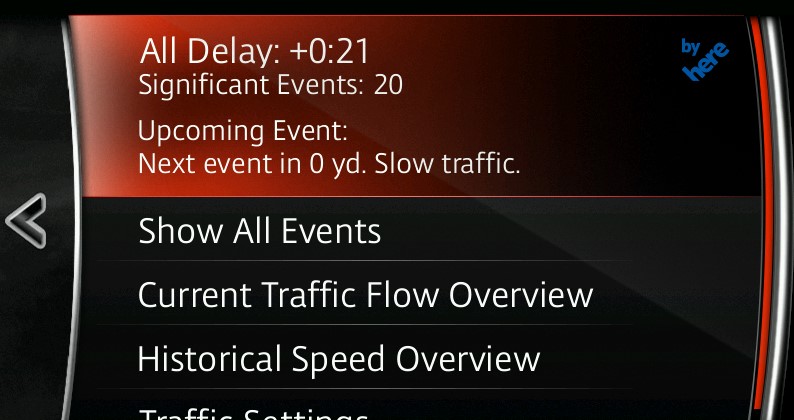
You can list the traffic events (grouped by event type) that might affect your route with the Show all events button.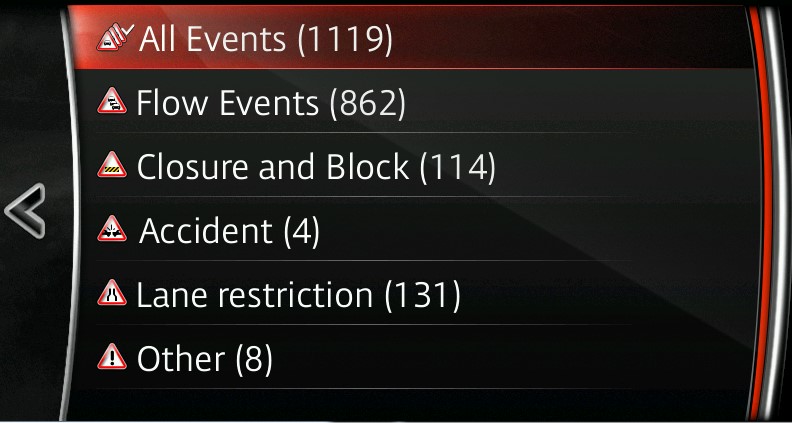
You can also select an individual traffic event and display it on the map.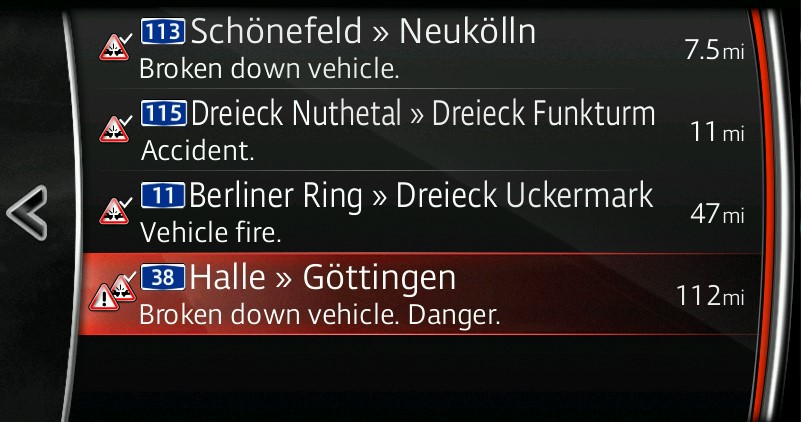
You can select Current Traffic Overview to view the current traffic conditions around you. You will see that the street segments are color-coded according to their traffic conditions. Green color represents a free traffic flow, while dark red means queuing traffic.
When live traffic is active and a route is set, detours can be offered if there is traffic along the route. If an alternative route becomes available, a notification will show on-screen asking if you wish to re-route around the incident and the time this could save you. To adjust the detour notification sensitivity or automatically accept detours, adjust the options within the traffic settings menu.
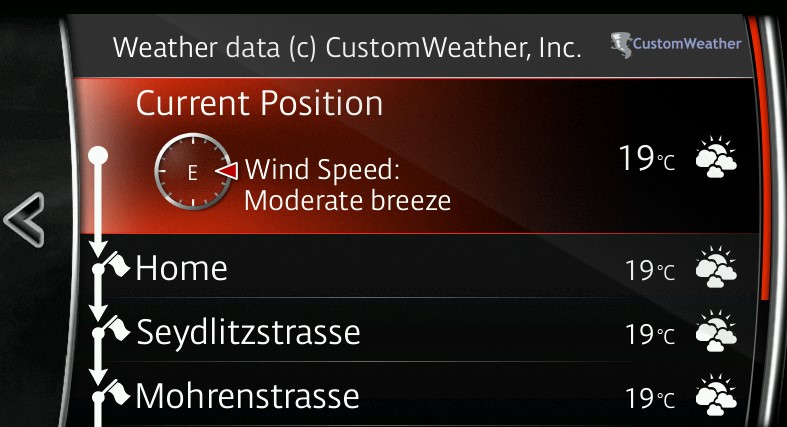
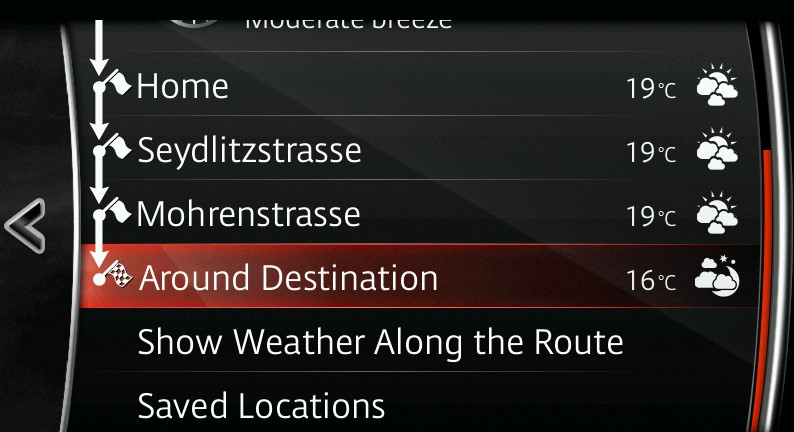
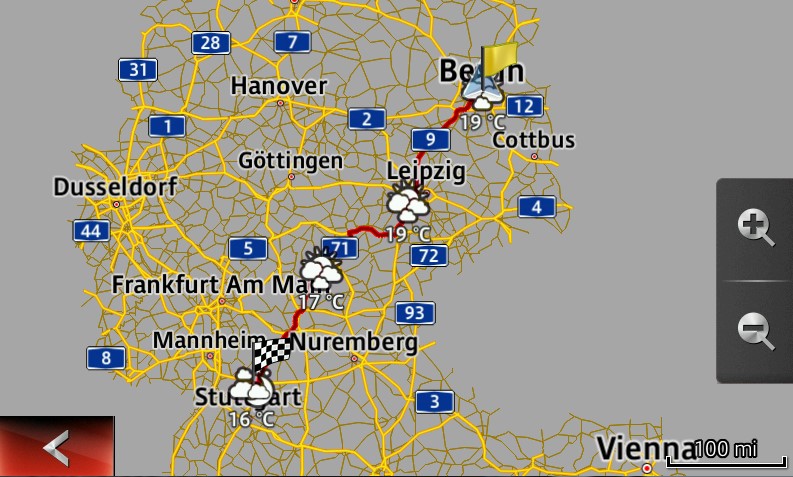
Online Weather – The Online Weather service gives you real-time information about the weather that might affect your route. Here is how to use this feature.
 button on the bottom menu.
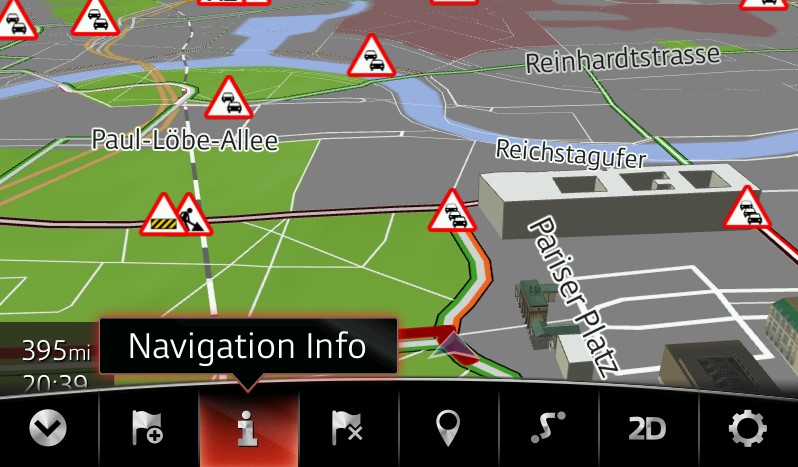
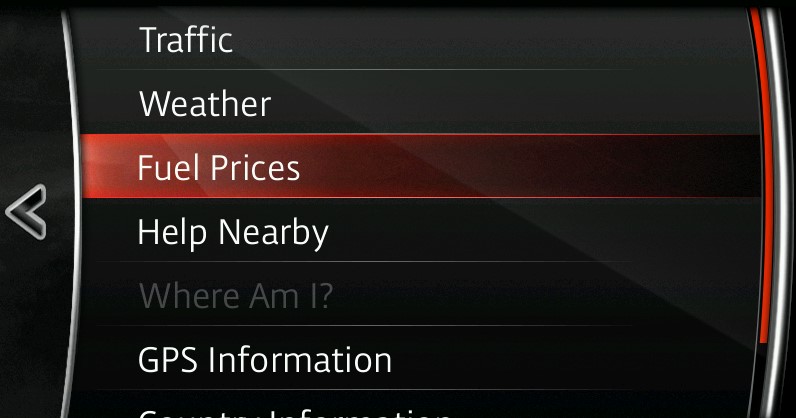
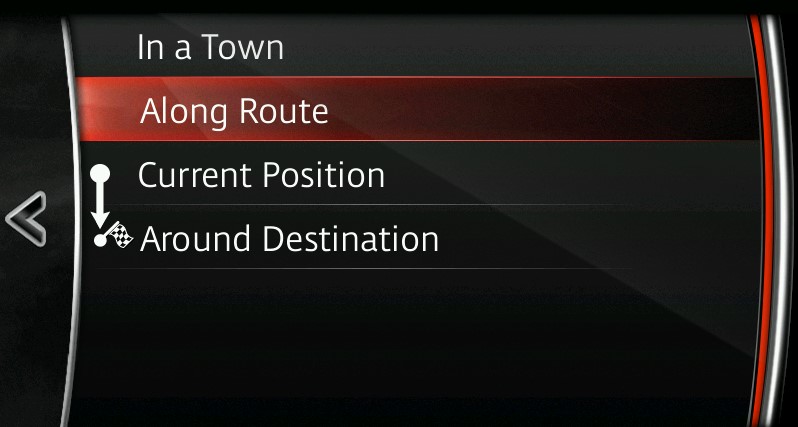
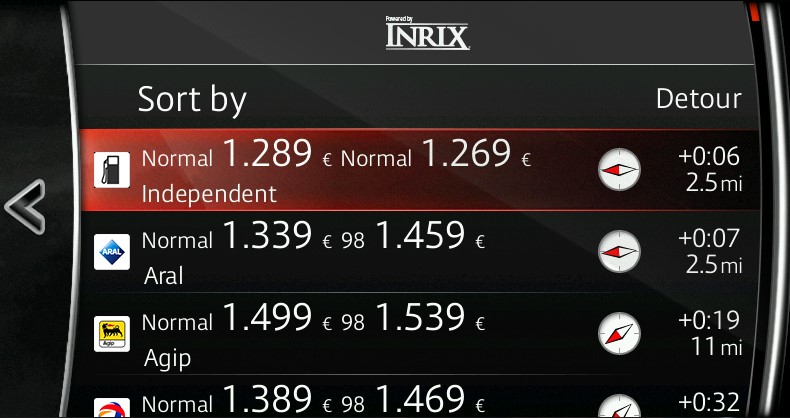
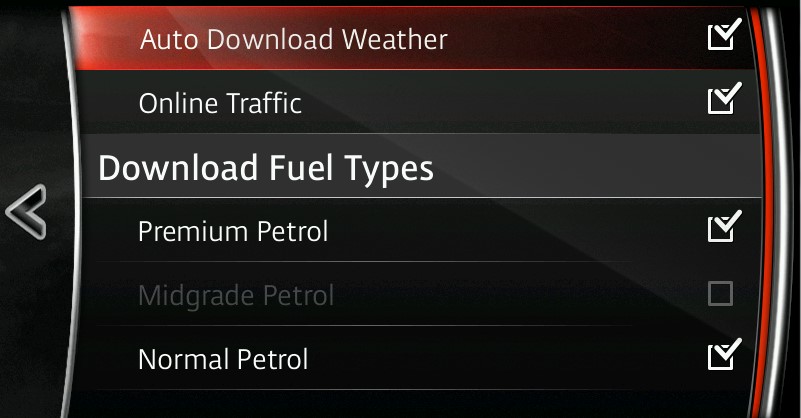
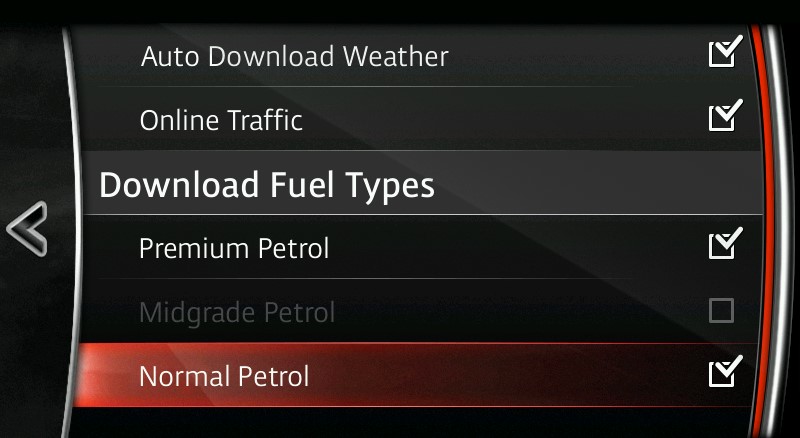
Fuel Prices – The Fuel Prices feature gives you real-time information about fuel prices in your area or along a planned route. To use this feature, please follow the steps below.
 button on the bottom menu.